If you’re looking to reduce your carbon footprint, save on energy costs, and contribute to a greener planet, installing a wind turbine at your home is an exceptional option. Wind energy is a renewable, clean, and increasingly accessible source of power. However, diving into this endeavor can seem daunting. Here’s a comprehensive guide to help you navigate the world of home wind turbines, offering you actionable advice, practical solutions, and clear problem-solving steps to make sustainable living more accessible.
Understanding the Problem: Why Wind Turbines?
As global energy consumption rises, so do concerns about fossil fuel dependency and its adverse environmental effects. Traditional electricity sources like coal, natural gas, and even some forms of renewable energy (like solar) can still have a significant carbon footprint. By utilizing wind energy, you’re not only cutting down on your household energy costs but also drastically reducing your reliance on non-renewable resources. However, this shift doesn’t come without its challenges—understanding the technology, complying with local regulations, and ensuring it’s a feasible option for your specific location are all essential steps you need to take.
With the right information and guidance, making the transition to a wind-powered home can be smooth and rewarding. In this guide, we’ll cover everything from the basics to advanced setup, ensuring you make an informed decision that fits both your needs and your environment.
Quick Reference
- Immediate action item: Assess your home's wind potential using a wind speed calculator.
- Essential tip: Familiarize yourself with local regulations and incentives related to wind energy.
- Common mistake to avoid: Overlooking the need for maintenance and understanding the turbine’s lifespan.
How to Assess Wind Potential at Your Home
Before investing in a wind turbine, it’s crucial to evaluate whether your home has sufficient wind to make this endeavor worthwhile. Here’s how you can start:
Step 1: Use a Wind Speed Calculator
Numerous online tools can provide an estimate of the average wind speed at your location. Websites like the National Renewable Energy Laboratory (NREL) offer free calculators. Here’s how to use one:
- Visit the NREL website.
- Navigate to the wind speed calculator tool.
- Enter your zip code or location details.
- Analyze the results and determine if the average wind speed is at least 8 to 10 miles per hour (mph) consistently for the year, which is typically sufficient for a residential wind turbine.
Step 2: Install a Wind Speed Meter
For a more precise evaluation, you can purchase a wind speed meter (anemometer) and install it at the highest point on your property. This device will give you accurate readings over several months, providing a more reliable assessment of your area's wind potential.
How to Choose the Right Wind Turbine
Once you’ve determined your location’s wind potential, the next step is selecting the appropriate wind turbine. Various factors will influence your choice, including the size, type, and specific energy needs of your home.
Step 1: Determine Your Energy Needs
Calculate your household’s average monthly energy consumption. This can be done by reviewing your electricity bills or using an online energy usage calculator. Understanding your energy requirements will help you decide the capacity of the turbine needed.
Step 2: Choose Between Horizontal and Vertical Axis Turbines
Horizontal Axis Wind Turbines (HAWT) are the most common type used for residential applications. They have a rotor blade that spins horizontally and are typically more reliable and produce more energy. Vertical Axis Wind Turbines (VAWT) are less common but can be more suitable for small, low-wind locations.
Step 3: Assess the Turbine’s Size and Power Output
Select a turbine that matches your calculated energy needs. A good rule of thumb is to choose a turbine that can produce at least 1 kW to 5 kW, depending on your consumption. Keep in mind the turbine's size will impact its installation, especially in terms of mounting height and space required.
Quick Reference
- Immediate action item: Calculate your household's monthly energy consumption.
- Essential tip: Opt for Horizontal Axis Wind Turbines (HAWT) for most residential applications.
- Common mistake to avoid: Choosing a turbine with insufficient power output based on incorrect energy need calculations.
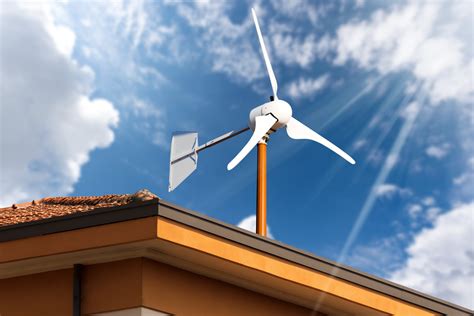
Installation and Setup: Making it Work for You
Once you’ve selected your wind turbine, the next critical phase is its installation and setup. This involves more than just physically mounting the turbine—it also requires ensuring it operates efficiently and safely.
Step 1: Acquire Necessary Permits
Before starting your installation, check with your local municipality or homeowner’s association to understand any regulations, zoning laws, or permits required for wind turbine installation. Some areas may have restrictions regarding height, placement, and even the types of turbines that can be installed.
Step 2: Site Preparation and Mounting
Select an ideal location for your turbine—typically the highest point on your property unobstructed by buildings, trees, or hills. Prepare the site by ensuring it's clear of any potential hazards. Depending on the turbine type, mounting can be either freestanding or on a tower. Freestanding turbines are typically fixed to a concrete pad or foundation, while tower-mounted turbines require a taller structure that supports the turbine at an optimal height—usually above 30 feet to maximize wind capture.
Step 3: Electrical Setup
Connect the turbine to your home’s electrical system. This involves connecting the turbine to your inverter, which converts the DC electricity produced by the turbine into AC electricity that your home uses. Ensure all connections are secure and follow local electrical codes. It might be helpful to consult a professional electrician if you’re not confident with the electrical work.
Maintenance and Longevity: Keeping Your Turbine Running Smoothly
After installation, regular maintenance is crucial to ensure your wind turbine operates efficiently and extends its lifespan. Here’s how to keep your turbine in top shape:
Step 1: Regular Inspections
Schedule periodic inspections—at least once a year—to check the condition of the turbine’s blades, bolts, and electrical connections. Look for signs of wear, corrosion, or damage. Early detection of issues can prevent significant problems down the line.
Step 2: Cleaning the Blades
Blades can accumulate dirt, debris, and even bird droppings, which can impair their efficiency. Use a soft brush or cloth and mild detergent to clean the blades. Avoid using harsh chemicals that could damage the coatings.
Step 3: Lubrication
Lubricate moving parts as recommended by the manufacturer. This usually involves greasing the bearings every few months to reduce friction and wear.
Quick Reference
- Immediate action item: Schedule an annual inspection of your wind turbine.
- Essential tip: Keep blades clean to maintain optimal efficiency.
- Common mistake to avoid: Neglecting regular lubrication of moving parts.
What are the common drawbacks of home wind turbines?
While wind turbines offer numerous benefits, they come with a few common drawbacks. These include noise concerns, potential harm to local wildlife, especially birds, and aesthetic issues. Moreover, if the wind is insufficient, the turbine may not generate significant power. Also, installation and maintenance can be costly and require technical expertise. However, these issues can often be mitigated with proper