If you’ve ever wondered about the powerful machines that scientists use to separate different components within fluids, you’re probably thinking about a centrifuge. Centrifuges are an indispensable tool in laboratories, from medical research to food science, and they play a crucial role in countless experiments. But what exactly is a centrifuge, how does it work, and how can you effectively use one to achieve precise results? This guide will walk you through everything you need to know, addressing your questions and solving your pain points in a practical, actionable way.
Understanding the Basics
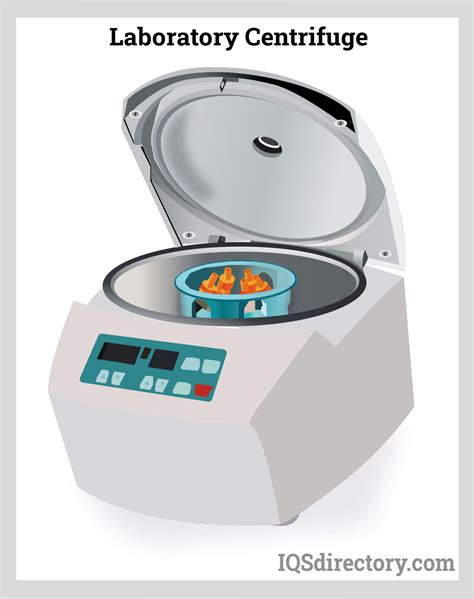
A centrifuge is a rotating device that uses the principle of centrifugal force to separate components of different densities in a mixture. This is achieved by spinning the mixture at high speeds, which pushes denser components outward against the container’s walls. Here’s a look at how this process unfolds:
1. Centrifugation Process: When you spin a mixture in a centrifuge, the centrifugal force compels particles to move outward. This difference in movement speed helps in separating substances that have different densities. 2. Applications: Centrifuges are used in medical labs to separate blood cells from plasma, in biochemistry to isolate DNA and RNA, and in food science to separate fat from milk.
Step-by-Step Guidance to Using a Centrifuge
Understanding the step-by-step operation of a centrifuge is essential to obtaining accurate results. Here’s a comprehensive guide:
Step-by-Step Instructions
1. Preparation: - Gather all necessary samples and appropriate centrifuge tubes. - Ensure that all tubes are securely sealed to avoid leaks during operation.
2. Loading: - Place the tubes into the centrifuge rotor carefully. Ensure they are balanced, either symmetrically if using a fixed-angle rotor or horizontally if using a swinging-bucket rotor. - Secure the rotor lid, making sure it fits snugly to prevent any potential leakage.
3. Settings: - Adjust the centrifuge speed and time settings according to the specific requirements of your experiment. For example, blood samples may need higher RPMs compared to smaller molecular biology samples.
4. Spinning: - Start the centrifuge. Allow it to reach full speed before stopping to ensure proper separation.
5. Disposing: - Once spinning has stopped, carefully remove the tubes. Handle them with care to avoid spills or contamination. Dispose of any biohazard materials according to safety protocols.
Troubleshooting and Best Practices
Following these best practices ensures successful and safe operation:
- Balance the Rotor: Always balance the rotor properly to prevent vibration and damage to the centrifuge and tubes.
- Use the Correct Rotor: Match the appropriate rotor type for your sample size and density differences.
- Check Seals: Ensure all tubes and lids are properly sealed before operation.
Quick Reference
Quick Reference
- Immediate action item: Ensure the centrifuge is turned off and has completely stopped spinning before opening the lid.
- Essential tip: Always balance the rotor to avoid damaging the machine and to get accurate results.
- Common mistake to avoid: Overfilling or underfilling tubes which can lead to improper separation and potential spills.
Detailed How-To Section: Preparing Blood Samples for Centrifugation
Separating blood components is a common application of centrifuges in medical labs. Here’s a detailed guide:
Step-by-Step Guide
1. Collection: - Collect blood samples using sterile, non-contaminating tubes. For plasma separation, use tubes that do not require clotting activators.
2. Labeling: - Label the tubes with the patient’s name and the date of collection to ensure traceability and avoid mix-ups.
3. Loading: - Place the tubes vertically in the rotor if using a swinging-bucket rotor, or at the correct angle in a fixed-angle rotor.
4. Centrifuge Settings: - Set the centrifuge to the appropriate speed (usually 3000-3500 RPM) and time (10-15 minutes) based on your lab’s protocols.
5. Separation: - After centrifugation, plasma will form a clear layer above the blood cells, making it easy to decant carefully.
6. Storage: - Store separated plasma at the recommended temperature (usually -20°C) until needed for further tests.
Troubleshooting Tips
- Leaks: If you notice any leaks during operation, stop immediately, and check tube seals and rotor fit.
- Uneven Separation: This can often be due to incorrect rotor balancing or inappropriate centrifuge settings. Re-evaluate these factors.
Detailed How-To Section: Isolating DNA for Molecular Biology Research
DNA isolation is a fundamental technique in molecular biology. Here’s how to use a centrifuge to effectively isolate DNA:
Step-by-Step Guide
1. Sample Preparation: - Begin with a cell lysate prepared by breaking open the cells using a mechanical or enzymatic method. This release the cellular contents, including the DNA.
2. Adding Phase Separation Reagent: - Add a phase separation reagent, such as phenol-chloroform, to separate the aqueous phase (containing DNA) from the organic phase.
3. Centrifuge Spin: - Spin the mixture in a centrifuge at a high speed (12,000 RPM) for 10-15 minutes to separate the phases.
4. Transfer and Wash: - Carefully transfer the aqueous phase to a new tube and wash it with alcohol to remove impurities.
5. Resuspend DNA: - Precipitate the DNA by adding isopropanol and a salt solution, followed by centrifugation at 12,000 RPM for 10 minutes.
6. DNA Solution: - Dissolve the DNA pellet in an appropriate buffer for further use in your experiments.
Troubleshooting Tips
- Incomplete Separation: Ensure all reagents are mixed thoroughly before spinning.
- DNA Aggregation: If DNA clumps, try a gentler wash or use a lower concentration of salt.
Practical FAQ
What precautions should I take while using a centrifuge?
There are several key precautions to ensure both the machine and you stay safe while using a centrifuge:
- Always balance your samples: Ensure tubes are balanced to prevent excessive vibration.
- Check seals: Ensure all tubes are properly sealed to avoid spills and potential hazards.
- Turn off when not in use: Always turn off the centrifuge before opening it to prevent injury.
- Follow manufacturer’s instructions: Always follow the specific guidelines provided by the centrifuge manufacturer for operation and maintenance.
- Handle biohazards with care: If you are handling biohazardous materials, ensure you are wearing the appropriate personal protective equipment (PPE) and following all safety protocols.
How do I determine the right speed and time for my centrifuge?
The right speed (RPM) and time for your centrifuge depends on several factors including the type of sample, its volume, and the density differences you aim to achieve. Here’s a step-by-step approach:
- Consult your lab’s protocol: Start by consulting the specific guidelines and protocols from your lab or research institution.
- Start low and go high: If you’re unsure, start at a lower speed and gradually increase until you achieve the desired separation.
- Time duration:</