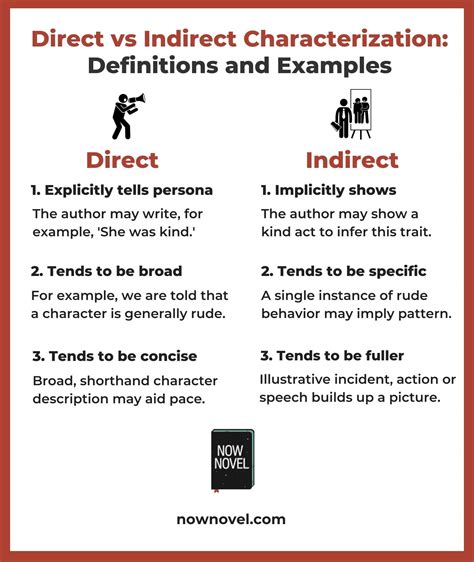
Problem-Solution Opening: Building a Rube Goldberg Machine in 2023
Building a Rube Goldberg machine can be both a thrilling and challenging project, especially if you’re not sure where to start. These intricate, elaborate contraptions are essentially clever chains of linked events that perform a simple task in an overly complex way. The best Rube Goldberg machines combine creativity, engineering, and a bit of madness. If you’re looking for a fun and educational project that’s as visually entertaining as it is intellectually stimulating, then constructing one in 2023 is a fantastic choice. This guide will walk you through the best Rube Goldberg machine ideas with step-by-step guidance, real-world examples, and practical tips to ensure your contraption runs smoothly and impressively.
Quick Reference
Quick Reference
- Immediate action item with clear benefit: Start with simple, reliable components like dominoes or toy cars. These can create a solid foundation for more complex elements.
- Essential tip with step-by-step guidance: Begin with a clear objective. Decide on the final action your machine will perform and sketch out a rough design.
- Common mistake to avoid with solution: Avoid over-engineering the first try. Keep it simple and add complexity gradually to avoid frustration and technical breakdowns.
Starting with a Simple Design
Creating a Rube Goldberg machine can seem overwhelming if you dive in without a plan. Here, we’ll start with some simple design ideas that can act as a blueprint for your project.
Basic Concept: Sequential Chain Reactions
A Rube Goldberg machine relies on a series of reactions where one action leads to the next. This chain reaction is the heart of your machine.
Choosing Your Components
Pick familiar components to build your foundation. Common, readily available items include:
- Dominoes: Perfect for beginners, they provide a visual and mechanical base.
- Toy Cars: Use a small toy car and ramps to create motion.
- Strings and Pulleys: These allow for lifting and pulling motions.
- Bubble Wrap: Useful for creating soft landings or unexpected delays.
Each of these items brings its own set of advantages. For example, dominoes are sturdy and reliable, while toy cars offer a bit more dynamism. Combining these elements can lead to a diverse and intricate design.
Sketching Out Your Design
Before you begin assembling any parts, sketch out a basic design. Even a rough sketch can help you visualize the sequence of actions. Here’s how:
- Draw a simple outline of what you want your machine to do.
- Mark where each component will be placed in relation to the final task.
- Plan out transitions and avoid cluttered pathways.
A clear sketch can save you a lot of headaches down the line, ensuring that you have a structured pathway for building your machine.
Building and Testing Simple Chains
Once you have your sketch, it’s time to start building. Begin with a simple chain using one type of component. For instance, a domino-based chain:
1. Lay out dominoes end-to-end in the desired sequence.
2. Ensure each domino is perfectly aligned with the next.
3. Gently knock the first domino to set off the chain.
4. Test and adjust as necessary until the entire chain reacts properly.
Adding Complexity
Now that you’ve built a simple chain, it’s time to add complexity to your machine. This is where the creativity comes into play.
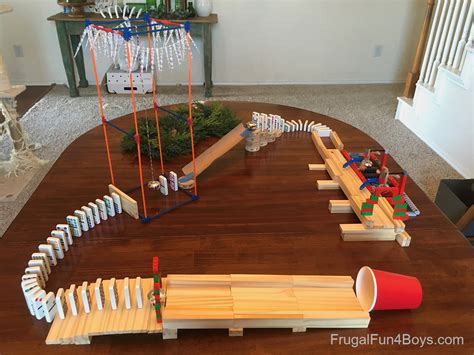
Incorporating Multiple Chains
Combine several types of components to create a more intricate design:
1. Use a domino sequence to launch a toy car.
2. Have the toy car knock over a series of bottles.
3. Incorporate string-pulley systems to lift and drop objects.
Integrating Levers and Ramps
Adding levers and ramps can introduce additional mechanical elements:
1. Use a lever to tilt a bottle, causing its contents to spill.
2. Create ramps that guide a rolling ball or car to specific locations.
3. Combine these elements to direct the flow of actions through your machine.
Using Everyday Objects
Don’t be afraid to use everyday objects to add more realistic elements:
1. Use a small cup filled with water as a final tipping point for your machine.
2. Create a paper clip that winds up using a spinning wheel.
3. Implement a kitchen utensil to make a washing machine spill soap.
Advanced Techniques and Tips
Once you’ve mastered the basics, you can start employing advanced techniques to further your Rube Goldberg machine:
Precision Engineering
Use precise measurements and angles to ensure each part of your machine operates flawlessly:
1. Use a protractor to measure angles accurately for ramps and levers.
2. Apply small weights to ensure items fall at the right moment.
3. Use adhesives to secure small parts in place.
Adding Delays
Introduce delays to make your machine more unpredictable:
1. Use bubble wrap to create soft landings and prolong falls.
2. Incorporate pulley systems that take time to wind up.
3. Use sticky tape or small weights to drag parts down slowly.
Coordinating Multiple Actions
Ensure that multiple actions occur in sequence:
1. Use timing devices, such as timers or small electric motors, to coordinate complex sequences.
2. Plan transitions carefully to avoid mechanical failures.
3. Test each sequence individually before integrating them.
Practical FAQ
What is the best material to use for a Rube Goldberg machine?
The best materials depend on your design and goals, but here are some practical options:
- Wood: Durable and can be easily cut and shaped.
- Plastic: Lightweight and can be molded into various shapes.
- Cardboard: Easy to cut and can be painted or decorated.
- Toy components: Easy to connect and provide a playful aesthetic.
Choose materials that are easy to work with and will hold up under repeated use.
How can I make sure my machine runs smoothly?
Here are some tips to ensure your machine runs smoothly:
- Test each component individually before combining them.
- Check for alignment and ensure each part moves freely.
- Adjust timings for delays and ensure coordinated sequences.
- Use lightweight materials to reduce friction and ensure smooth motion.
By testing each element and making small adjustments, you can create a machine that operates reliably.
What should I do if my Rube Goldberg machine breaks?
If your machine breaks, here’s how to troubleshoot and fix it:
- Identify the point of failure. Is it a connection that’s not aligned or a part that’s too heavy?
- Reassess the design and look for any weak points.
- Make small, incremental changes and test after each adjustment.
- Consider using alternative materials or components if the original parts are failing.
Remember, patience and careful testing are