You’ve heard about Two-Factor Authentication (2FA), and it sounds like a fantastic way to beef up the security of your online accounts, but perhaps you’re experiencing some hassle with it or have decided that it’s just not right for you right now. Either way, this guide will walk you through everything you need to deactivate 2FA safely and effectively.
Why You Might Want to Deactivate 2FA
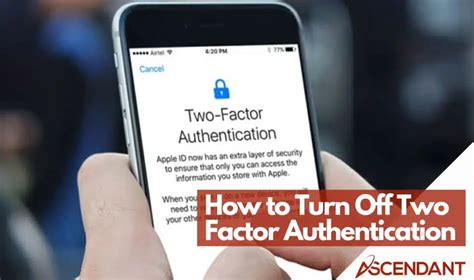
Two-Factor Authentication adds an extra layer of security, but it can sometimes create problems of its own. Perhaps you’re having difficulty remembering your authentication codes, or maybe the process is just too cumbersome for your daily routine. Whatever the reason, it’s important to deactivate 2FA in a way that respects both your security needs and your practical daily life.Before You Begin
Before diving into the process of deactivating 2FA, it’s crucial to understand that you’re giving up a layer of protection. While it’s okay to make this choice if you’re certain that it’s the right step for you, consider consulting with a cybersecurity expert if you have doubts. It’s also worth looking into backup security options that may strike a balance between security and convenience.Quick Reference
Quick Reference
- Immediate action item with clear benefit: Ensure all devices are updated before removing 2FA
- Essential tip with step-by-step guidance: Log into your account and navigate to the security settings
- Common mistake to avoid with solution: Do not deactivate 2FA without having a backup plan in place
Step-by-Step Guide to Deactivate 2FA
Deactivating 2FA involves several steps, but don’t worry – we’ll walk you through it. Here’s what you need to do:Step 1: Backup Your Information
Before making any changes, ensure that you have all your important data backed up. If you’re an online banking user, make sure your account information is safe and secure on another device. It’s also wise to have a copy of your account recovery information ready in case something goes wrong.Here’s how to back up your data:
- Go to your account settings and download your account information if the option is available
- Print out recovery codes and store them in a safe place
- Copy sensitive information to a secure offline device
Step 2: Log into Your Account
To deactivate 2FA, you need to log into your account first. This will typically require you to enter your password and possibly a temporary 2FA code if you haven’t logged out completely yet.Here’s how to do it:
- Open your web browser and navigate to the account’s login page
- Enter your username and password
- If prompted for a 2FA code, enter the code sent to your 2FA app or device
Step 3: Navigate to Security Settings
Once logged in, navigate to the account security settings where 2FA is enabled.Here’s a general outline:
- From the account dashboard, look for a “Security” or “Account Security” tab
- In this section, find the 2FA or Two-Factor Authentication option
Step 4: Deactivate 2FA
The exact steps for deactivating 2FA might vary by platform, but generally you’ll find an option to turn off or disable 2FA.Here’s a typical deactivation process:
- Select the “Disable” or “Turn Off” option next to 2FA
- Confirm your decision when prompted. Some accounts might ask you for your password again
- Verify your identity using a temporary code sent to your email or phone if required
Step 5: Confirm Deactivation
After deactivating 2FA, you should get a confirmation message on the screen. You might also receive an email verifying the change.Here’s what to do next:
- Check your email for any confirmation messages
- Ensure that 2FA is no longer required when you try to log in again
Troubleshooting Common Issues
You might run into a few bumps along the way, but here’s what to do when things go sideways:If you can’t find the 2FA settings:
- Check the help section or FAQs of the account service
- Look for “Security Settings” as the location might vary slightly
If you’re locked out after deactivation:
- Contact customer support for help
- Use your recovery options to regain access
Practical FAQ
What if I forget my password after deactivating 2FA?
If you forget your password and can’t log in after deactivating 2FA, most accounts offer a password recovery process. Typically, you’ll need to:
- Click on the “Forgot Password” link on the login page
- Enter your registered email or phone number
- Follow the instructions sent to your recovery email or via SMS to reset your password
If you don’t have access to your recovery email or phone number, you might need to reach out to customer support directly to regain access to your account.
Is there any way to deactivate 2FA without losing my account information?
While deactivating 2FA means losing that extra layer of security, you can still keep your account information secure by:
- Ensuring you have backups of important account information
- Changing your passwords to stronger, unique ones if they’ve been used on multiple accounts
- Keeping your account recovery details up to date
Consider setting up alternative security measures, such as stronger passwords or alternate authentication methods if available.
Best Practices After Deactivating 2FA
Deactivating 2FA is only part of the journey; now it’s time to re-secure your account in a practical yet effective manner.Use Stronger Passwords
After removing 2FA, it’s critical to ensure that your account password is strong and unique. Avoid using passwords you’ve used on other sites and consider using a password manager to generate and store complex passwords.Enable Backup Authentication Methods
While you might have deactivated 2FA, it’s wise to have a fallback or alternative form of authentication that’s less cumbersome but still secure.Regularly Monitor Your Account
After making changes to your security settings, keep an eye on your account for any unusual activity. Regularly reviewing your account statements and security alerts will help you catch potential security issues early.By following this guide, you can deactivate 2FA in a way that balances security and convenience for your everyday use. Always remember, no security measure is perfect, and it’s up to you to maintain the best practices to keep your information safe.