Understanding the exact freezing point of water is essential knowledge for scientists across various fields. It is not merely a theoretical concept but a fundamental parameter that impacts numerous scientific experiments, engineering applications, and environmental studies. This guide will equip you with the practical steps to determine the freezing point of water in Celsius, provide tips for accurate measurement, and address common issues you might encounter along the way.
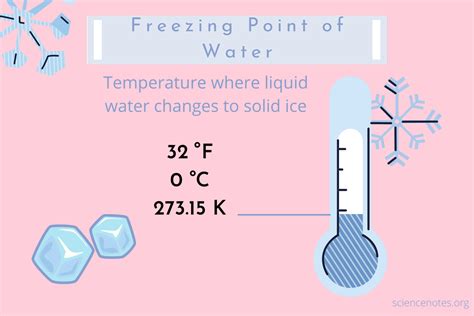
To start with, the freezing point of water is a vital baseline measurement. Water's freezing point is 0 degrees Celsius under standard atmospheric pressure, yet variations due to impurities, pressure changes, or altitude can affect this. Understanding how to precisely measure this point ensures the accuracy of your scientific investigations and applications.
Problem-Solution Opening Addressing User Needs
One of the most frequent challenges scientists face is ensuring the precise measurement of water’s freezing point. This is crucial in fields like chemistry, environmental science, and even culinary arts, where accuracy can affect outcomes significantly. The discrepancy can arise due to several factors such as calibration errors, temperature fluctuations, or equipment limitations. This guide aims to demystify the process, offering a step-by-step method for achieving the exact freezing point of water in Celsius, ensuring your experiments are as precise as possible.
Quick Reference
Quick Reference
- Immediate action item with clear benefit: Use a calibrated thermometer for accurate temperature readings.
- Essential tip with step-by-step guidance: Start with 100 ml of pure water and gradually lower the temperature to observe freezing.
- Common mistake to avoid with solution: Ensure the thermometer is below the ice-water mixture to get the most accurate readings.
How to Calibrate Your Thermometer for Accurate Readings
To achieve the exact freezing point of water, begin by calibrating your thermometer. A precise thermometer is indispensable for obtaining accurate readings.
- Step 1: Prepare a Calibration Bath
Use a container filled with ice and water. This mixture will naturally sit at 0 degrees Celsius. Place your thermometer in the ice-water bath, ensuring it is fully submerged but not touching the container’s bottom.
- Step 2: Adjust the Thermometer
Wait for the thermometer’s reading to stabilize. If it does not read exactly 0 degrees Celsius, adjust it accordingly. This step is crucial to ensure your thermometer’s accuracy.
This calibration process ensures your thermometer will provide accurate readings during your water freezing experiments.
Step-by-Step Guide to Measuring Water’s Freezing Point
Following the thermometer calibration, here’s a detailed process to measure water’s freezing point accurately.
- Step 1: Gather Your Materials
You will need 100 ml of pure water, a beaker or glass container, and a calibrated thermometer. Ensure your water is free from impurities.
- Step 2: Prepare the Container
Pour the water into a beaker or glass container that is clean and dry. Ensure no air bubbles are trapped as they can affect temperature readings.
- Step 3: Submerge the Thermometer
Insert the calibrated thermometer into the water. Ensure it is fully submerged and positioned correctly so it reads the temperature of the water, not the surrounding air.
- Step 4: Gradually Lower the Temperature
Place the container in an environment where the temperature can be gradually lowered. This could be a freezer set at a very low temperature, or a controlled cold room. Monitor the thermometer as the water cools.
- Step 5: Observe the Freezing Point
Once the temperature starts dropping, closely observe the thermometer as the water begins to freeze. Note the exact temperature at which the first ice crystals form. This is water’s freezing point, precisely 0 degrees Celsius under standard conditions.
- Step 6: Confirm the Freezing Point
After observing the initial freezing, continue to lower the temperature slightly to ensure that the entire water volume is frozen at the same exact point. This confirmation helps verify the accuracy of your measurement.
By following these detailed steps, you ensure that your measurement is both precise and reliable.
Practical FAQ
Why is it important to use pure water for this experiment?
Pure water (free from impurities like salts or organic materials) freezes at a precise 0 degrees Celsius under standard pressure conditions. Impurities can lower the freezing point, leading to inaccurate measurements. Using pure water ensures your results are based on these standard conditions.
What should I do if my thermometer does not reach 0 degrees Celsius?
First, ensure the thermometer is correctly calibrated. If the calibration seems accurate and you’re still not reaching 0 degrees, consider environmental factors like uneven cooling. If the problem persists, recalibrate your thermometer against a known standard to rule out any equipment issues.
Can I use sea water to measure the freezing point?
No, sea water should not be used. Salts and other impurities in sea water lower its freezing point significantly. To measure the true freezing point of water, use distilled or deionized water. This ensures your measurement reflects the standard freezing point of pure water.
The importance of understanding water’s freezing point cannot be overstated. With this guide, you have all the necessary steps and tips to ensure your measurements are precise and reliable. Whether for scientific research or everyday practical use, mastering this knowledge equips you with the foundation for more complex experiments and applications.